[鐵人賽Day22] 實作Web即時共同編輯文件 (2) - 使用signalR同步文件內容
文章目錄
沒想到昨天光完成前端的部分就花那麼多時間,看來這次實作比上次難了不少,大概是因為沒使用套件的關係吧!XD
那麼今天就來做signalR同步的部分吧。
資料Binding
我們要來想想再修改資料成功後,要怎麼回應給Server,回應格式要怎麼訂,先來訂一下後端的資料格式吧!
建立容器
先創一個CellModel.cs,大致內容如下
using System;

namespace EditFileWeb.Models
{
    public class CellModel
    {
        // cell名稱
        public string cellName{get;set;}
        // Cell內容
        public string text { get; set; }
        // 編輯者
        public string editor { get; set; }
        // 有無上鎖
        public bool lockState { get; set; }
    }
}
再創一個UserModel用來裝使用者的資訊,這邊最重要的部份是要儲存使用者的代表顏色color,id為signalR產生的connectionid,name則是需要資料庫時讀取,不過我們這邊沒用,是我先預留的。
using System;
using System.Collections.Generic;

namespace EditFileWeb.Models
{
    public class UserModel
    {
        // id
        public string id { get; set; }
        // 名稱
        public string name { get; set; }
        // 代表色
        public string color { get; set; }
    }
}
最後再創一個FileModel.cs,使用泛型Dictionary<T,T>來裝上面的上面的CellMode,再一個泛型List<T>來裝目前編輯的使用者
using System;
using System.Collections.Generic;

namespace EditFileWeb.Models
{
    public class FileModel
    {
        // 文件名稱
        public string filename { get; set; }
        // 行
        public int row { get; set; }
        // 列
        public int column { get; set; }
        // 文件內容
        public List<CellModel> textList { get; set; }
        // 使用中的文件用戶
        public List<UserModel> editor { get; set; }
        // 建立者
        public string creator { get; set; }

    }
}
建立FileServie
再來建立FileServie.cs用來儲存我們的文件資料,基本上就是新增和取得和新增file,在一個CreateTestFile來建立測試用的方法,比較特別的是EditFileCell修改cell的方法,這次我們用比較聰明的LINQ來達成,上一個實作寫太趕了,一直忘記List和Dictionary都有實作IEnumerator,所以能用LINQ來做查詢修改。
using System;
using System.Collections.Generic;
using EditFileWeb.Models;
using System.Linq;

namespace EditFileWeb.Services
{
    public class FileService
    {
        private List<FileModel> list;
        public FileService()
        {
            list = new List<FileModel>();
            CreateTestFile();
        }
        // 取得文件
        public FileModel GetFile(string fileName)
        {
            var file = (from f in list where f.filename == fileName select f).FirstOrDefault();

            return file;
        }

        // 新增文件
        public bool AddFile(FileModel file)
        {
            list.Add(file);
            return true;
        }

        // 編輯文件
        public CellModel EditFileCell(string fileName, string cellName, string text)
        {
            // 找出哪個file
            var file = (from f in list where f.filename == fileName select f).FirstOrDefault();
            // 找出哪個cell
            var cell = (from c in file.textList where c.cellName == cellName select c).FirstOrDefault();
            cell.text = text;

            return cell;
        }

        // 建立測試File
        public void CreateTestFile()
        {
            var fileModel = new FileModel();
            fileModel.creator = "Test";
            fileModel.filename = "TestFile";
            fileModel.row = 5;
            fileModel.column = 5;
            fileModel.editor = new List<UserModel>();
            List<CellModel> textList = new List<CellModel>();
            for (int i = 0; i < 5; i++)
            {
                for (int j = 0; j < 5; j++)
                {
                    var cellModel = new CellModel();
                    cellModel.lockState = true;
                    cellModel.text = "";
                    cellModel.cellName = $"{i}{j}";
                    textList.Add(cellModel);
                }
            }
            fileModel.textList = textList;
            list.Add(fileModel);
        }
    }
}
建立FileHub
再來建立FileHub.cs,一樣建構子接收FileServie,今天先做2個方法就好GetFile()和EditText()
using System;
using System.Threading.Tasks;
using Microsoft.AspNetCore.SignalR;
using EditFileWeb.Services;

namespace EditFileWeb.Hubs
{
    public class FileHub : Hub
    {
        private FileService _service;
        public FileHub(FileService service)
        {
            _service = service;
        }

        public async Task GetFile(string fileName)
        {
            var file = _service.GetFile(fileName);
            await Clients.Caller.SendAsync("ReceiveFile", file);
        }

        public async Task EditText(string fileName, string cellName, string text)
        {
            var editText = _service.EditFileCell(fileName, cellName, text);
            await Clients.All.SendAsync("ReceiveEditText", cellName, editText.text);
        }

        // 連線
        public override async Task OnConnectedAsync()
        {
            await base.OnConnectedAsync();
        }
        // 斷線
        public override async Task OnDisconnectedAsync(Exception exception)
        {
            await base.OnDisconnectedAsync(exception);
        }
    }
}
Starup.cs先引用Hub和Service
using EditFileWeb.Hubs;
using EditFileWeb.Services;
再註冊FileService和signalR的Router
public void ConfigureServices(IServiceCollection services)
{
    services.AddSignalR();
    services.AddSingleton<FileService>();
}

public void Configure(IApplicationBuilder app, IHostingEnvironment env)
{
    if (env.IsDevelopment())
    {
        app.UseDeveloperExceptionPage();
    }

    app.UseDefaultFiles();
    app.UseStaticFiles();

    app.UseSignalR(routes =>
    {
        routes.MapHub<FileHub>("/fileHub");
    });
}
前端處理
首先安裝前端signalR套件,再來最後的前端的部分,我們先把createTable()這方法刪掉,因為我們現在是要由後端丟回的資訊來決定怎麼畫表格。
取得資料畫出表格
首先我們要修改畫表格的方式,連線成功後馬上取得File的資訊,呼叫GetFile()方法,然後再接收方法內開始畫表格,因為我們file資訊內有設定row和column,所以就輕鬆用2個for迴圈畫出來就行,然後要再迴圈內幫cell建立ID
connection.start()
    .then(function () {
        connection.invoke('GetFile', 'TestFile').catch(function (err) {
            return console.error(err.toString());
        });
    })
    .catch(function (err) {
        return console.error(err.toString());
    });

connection.on("ReceiveFile", function (file) {
    console.log(file);
    var count = 0;
    for (var i = 0; i < file.row; i++) {
        var row = document.createElement('tr');
        for (var j = 0; j < file.column; j++) {
            var cell = document.createElement('td');
            cell.id = file.textList[count].cellName;
            cell.addEventListener('click', cellEdit);
            cell.appendChild(createCell());
            row.appendChild(cell);
            count++;
        }
        table.append(row);
    }
});
建立input change的方法
我們要在編輯表格時,邊寫資料邊回傳,所以要監聽所有input的change事件,這邊我們也可以寫在td內,因為input改變時td內的元素也會改變,有興趣可以查查JS冒泡事件,再建立一個接收用的事件,來修改所有人的表格內容。
function change() {
    console.log(this);
    connection.invoke('EditText', 'TestFile', this.id, this.childNodes[0].value).catch(function (err) {
        return console.error(err.toString());
    });
}

connection.on("ReceiveFile", function (file) {
    console.log(file);
    var count = 0;
    for (var i = 0; i < file.row; i++) {
        var row = document.createElement('tr');
        for (var j = 0; j < file.column; j++) {
            var cell = document.createElement('td');
            cell.id = file.textList[count].cellName;
            cell.addEventListener('click', cellEdit);
            // cell塞入change事件
            cell.addEventListener('input', change);
            // 建立cell填入後端紀錄的值
            cell.appendChild(createCell(file.textList[count].text));
            row.appendChild(cell);
            count++;
        }
        table.append(row);
    }
});

connection.on("ReceiveEditText", function (cellName, text) {
    document.getElementById(cellName).childNodes[0].value = text;
});
最後再建立cell時填入後端傳回的值,這樣不同時間進來的人就讀到一樣的內容
// 建立Cell
function createCell(text) {
    var input = document.createElement('input');
    input.addEventListener('blur', cellLock);
    input.value = text;
    input.type = 'text';
    input.readOnly = true;
    return input;
}
到這邊就完成啦!!!,明天我們再來寫其他細節的部分。
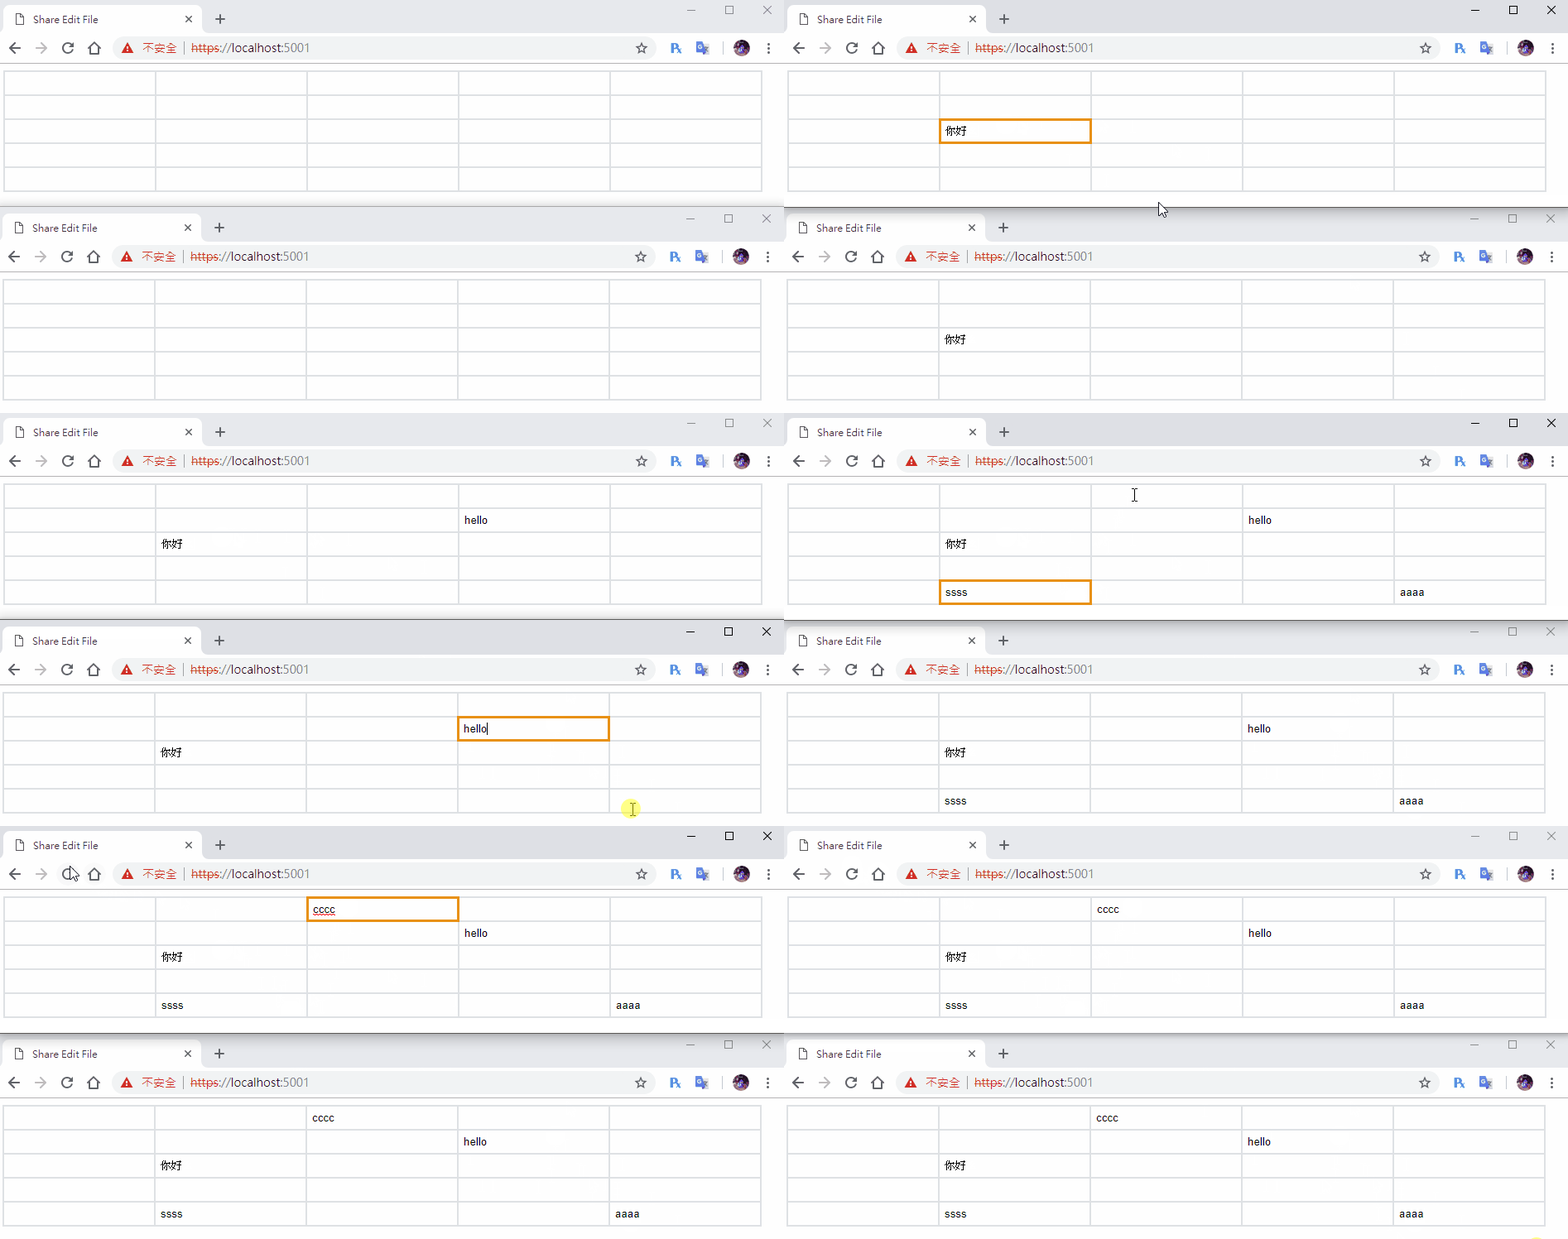
DEMO
