今天我們要來做自訂表格內容和連線列表,既然建立表格的方法都訂好了,當然要能從前端建立啊!XD
各畫面區塊建立
這次我想做4個畫面登入畫面、文件選擇畫面、文件建立表單、文件編輯畫面,首先把div區塊做出來
 1
 2
 3
 4
 5
 6
 7
 8
 9
10
11
12
13
14
15
16
17
18
19
20
21
22
23
|
<!-- 登入畫面 -->
<div id="loginDiv">
</div>

<!-- 文件選擇畫面 -->
<div id="fileListDiv" style="display:none">

</div>

<!-- 文件編輯畫面 -->
<div id="fileDiv" style="display:none">
    <div class="onlineList" id="userList">
    </div>
    <hr>
    <table id="table">

    </table>
</div>

<!-- 文件建立表單 -->
<div id="createFileDiv" style="display:none">

</div>
|
然後先建立個區塊DOM物件變數
1
2
3
4
|
var loginDiv = document.getElementById('loginDiv');
var fileListDiv = document.getElementById('fileListDiv');
var fileDiv = document.getElementById('fileDiv');
var createFileDiv = document.getElementById('createFileDiv');
|
登入畫面建立
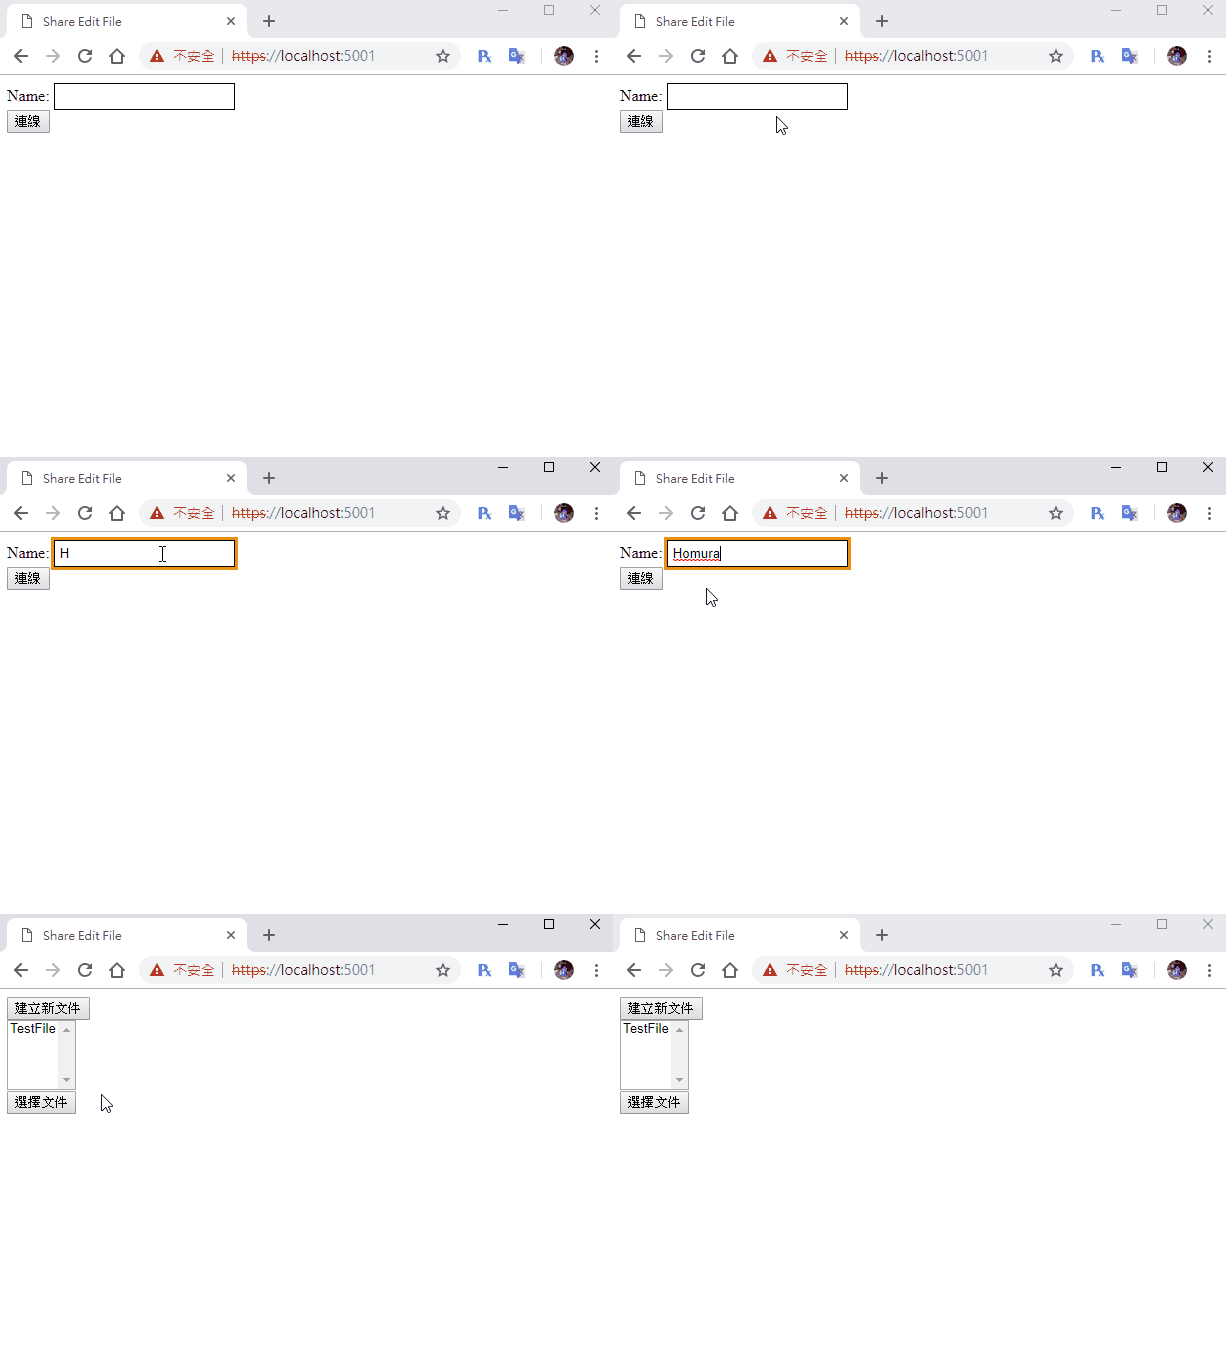
首先我們先做登錄畫面,登入畫面只需要輸入名稱就行,因為我們沒做資料庫,不需要帳號密碼XD
1
2
3
4
|
Name:
<input id="name" type="text" class="input">
<br>
<button id="connectBtn" type="button">連線</button>
|
還有因為把input改成透明了,所以名稱這邊要給他樣式,不然看不到
1
2
3
4
|
.input{
    background: white;
    border: 1px solid;
}
|
取得button物件和名稱變數name,name用來儲存名字使用
1
2
|
var connectBtn = document.getElementById('connectBtn');
var name = '';
|
登入後跟Serve開始連線,也就是說之前的連線事件要放進button的onclick事件裡面,然後先切換區塊及儲存名字,在開始連線
 1
 2
 3
 4
 5
 6
 7
 8
 9
10
11
12
13
14
15
16
17
|
connectBtn.addEventListener('click', function () {
    // 切換成文件選擇畫面
    loginDiv.style.display = 'none';
    fileListDiv.style.display = '';
    // 儲存名字
    name = document.getElementById('name').value;
    // 連接事件
    connection.start()
    .then(function () {
        connection.invoke('GetFile', LoadFile).catch(function (err) {
            return console.error(err.toString());
        });
    })
    .catch(function (err) {
        return console.error(err.toString());
    });
});
|
註:原本的connection.start()記得刪除
連線文件列表建立
我們一樣建立一個select元素當列表,一樣記得給他multiple屬性,上面放建立文件的button,下面放選擇文件的button
1
2
3
4
5
6
7
|
<button id="goCreateFileBtn" type="button">建立新文件</button>
<br>
<select id="fileList" multiple>

</select>
<br>
<button id="getFileBtn" type="button">選擇文件</button>
|
載入DOM
1
2
3
|
var getFileBtn = document.getElementById('getFileBtn');
var fileList = document.getElementById('fileList');
var goCreateFileBtn = document.getElementById('goCreateFileBtn');
|
再來到FileService建立取得所有文件的方法GetFileList
1
2
3
4
|
public List<FileModel> GetFileList()
{
    return list;
}
|
然後到FileHub也新增取得所有文件的方法GetFileList,注意回傳給呼叫的User就好,傳送回去的方法叫做ReceiveFileList
1
2
3
4
|
public async Task GetFileList()
{
    await Clients.Caller.SendAsync("ReceiveFileList", _service.GetFileList());
}
|
回前端的連線connectBtn的click事件從GetFile改成GetFileList,然後傳回的變數LoadFile刪除。
1
2
3
4
5
6
7
8
9
|
connection.start()
.then(function () {
    connection.invoke('GetFileList').catch(function (err) {
        return console.error(err.toString());
    });
})
.catch(function (err) {
    return console.error(err.toString());
}
|
最後得到資料後,把資料填入select列表內
 1
 2
 3
 4
 5
 6
 7
 8
 9
10
|
connection.on("ReceiveFileList", function (fileListDate) {
    // 清空列表
    fileList.innerHTML = '';
    // 建立列表
    for (var i = 0; i < fileListDate.length; i++) {
        var option = document.createElement('option');
        option.innerHTML = fileListDate[i].filename;
        fileList.appendChild(option);
    }
});
|
DEMO

今天就這些,明天來完成新增文件表單及讀取文件的部分
範例下載
