今天繼續把投票系統沒做完的做完吧,上一篇我們是從後端建立一個新的投票,今天我們要做成改成前端建立投票,然後讓大家進去投票,這個部分有點長,所以也是拆成2偏來講。
建立UI頁面
這邊我們不需要真的建立3個HTML,只要使用<div>元素拆成3個區塊。
建立3個區塊頁面
3個區塊頁面分別是投票選單、新增投票表單、投票區塊,一次只顯示一個區塊,沒用的區塊我們把他的CSS的display屬性設成none
 1
 2
 3
 4
 5
 6
 7
 8
 9
10
11
12
13
14
|
<!-- 投票頁面 -->
<div id="voteRoom" style="display:none">
    <div class="canvas">
        <canvas id="myChart"></canvas>
    </div>

</div>
<!-- 所有投票選單 -->
<div id="voteMenu" style="display:none">

</div>
<!-- 新增投票區 -->
<div id="voteForm">
</div>
|
載入頁面DOM 物件
1
2
3
|
var voteRoom = document.getElementById('voteRoom');
var voteMenu = document.getElementById('voteMenu');
var voteForm = document.getElementById('voteForm');
|
建立新增投票表單
首先我們先來做投票表單部分,一個input做投票名稱,一個select元素用來動態建立選項input,建立一個div裡面放動態建立的投票選項input
 1
 2
 3
 4
 5
 6
 7
 8
 9
10
11
12
13
14
15
|
<button id="cancelCreateVote" type="button">取消</button>
<button id="submit" type="button" >送出</button><br>
投票名稱:<input id="voteName" type="text"><br>
投票選項數目:
<select id="selCount">
    <option>0</option>
    <option>1</option>
    <option>2</option>
    <option>3</option>
    <option>4</option>
    <option>5</option>
</select>
<div id="voteSel">

</div>
|
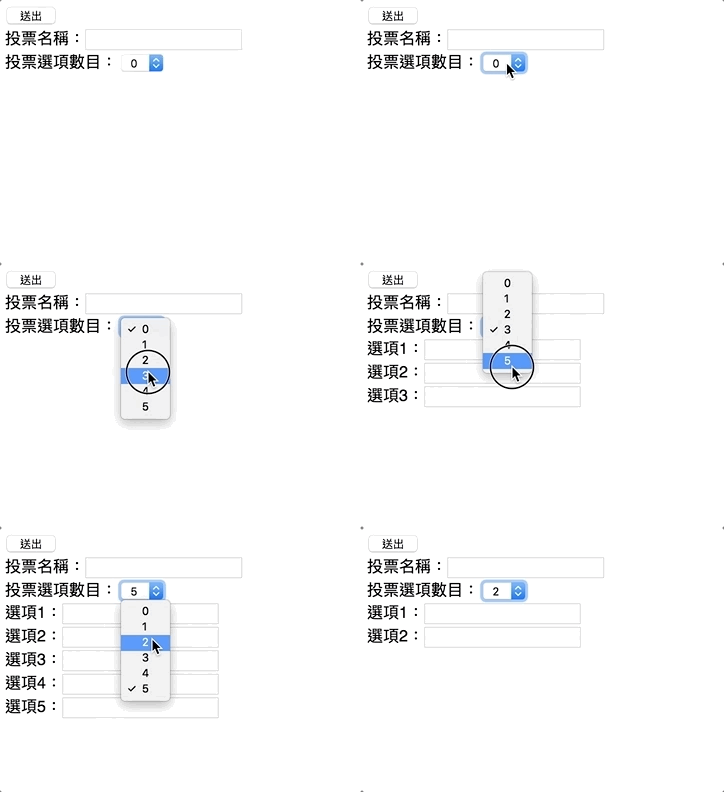
建立selCount的change監聽事件,每次變動都會動態建立N個input選項
 1
 2
 3
 4
 5
 6
 7
 8
 9
10
11
12
13
14
15
16
17
|
var selCount = document.getElementById('selCount');
var voteSel = document.getElementById('voteSel');
var submit = document.getElementById('submit');

selCount.addEventListener('change', function () {
    voteSel.innerHTML = '';
    var count = selCount.value;
    for (var i = 0; i < count; i++) {
        var input = document.createElement('input');
        var br = document.createElement('br');
        input.type = 'text';
        input.id = `sel${i}`;
        voteSel.append(`選項${i + 1}:`);
        voteSel.appendChild(input);
        voteSel.appendChild(br);
    }
})
|
畫面大概像下圖

建立CreateVote方法
接下來我們要丟資料給ChartHub,ChartService上次已經建立過CreateVote()的方法了,所以不需要了再做一個,我們還需要一個GetVoteList來取得所有的投票資料。
VoteService.cs
1
2
3
4
|
public List<VoteModel> GetVoteList()
{
    return voteModelList;
}
|
接下來在ChartHub建立一個新增投票的方法CreateVote()用來建立新的投票,建立完成記得回傳給所有人更新現有的投票列表
ChartHub.cs
 1
 2
 3
 4
 5
 6
 7
 8
 9
10
11
12
13
14
15
16
17
18
|
public async Task CreateVote(string voteName,string[] voteSelect)
{
    VoteModel voteModel = new VoteModel();
    voteModel.voteName = voteName;
    voteModel.creator = "Test";
    voteModel.startDate = DateTime.Now;
    Dictionary<string, int> _voteSelect = new Dictionary<string, int>();

    for (int i = 0; i < voteSelect.Length; i++)
    {
        _voteSelect.Add(voteSelect[i], 0);
    }

    voteModel.voteSelect = _voteSelect;
    _voteService.CreateVote(voteModel);

    await Clients.All.SendAsync("ReceiveVoteList", _voteService.GetVoteList());
}
|
signalR前端呼叫和接收
接下來只要呼叫方法丟資料及建立接收方法就行,送出的方法記得要放在按鈕裡
 1
 2
 3
 4
 5
 6
 7
 8
 9
10
11
12
13
14
|
submit.addEventListener('click', function () {
    var voteName = document.getElementById('voteName');
    var voteSelList = new Array();
    var count = selCount.value;
    for (var i = 0; i < count; i++) {
        var sel = document.getElementById(`sel${i}`).value;
        voteSelList.push(sel);
    }

    connection.invoke("CreateVote", voteName.value, voteSelList).catch(function (err) {
        return console.error(err.toString());
    });

})
|
接收的方法我們上一篇有建立過,不過我們這邊要改一下,變數名稱改成ReceiveVoteList,換成下面的
1
2
3
|
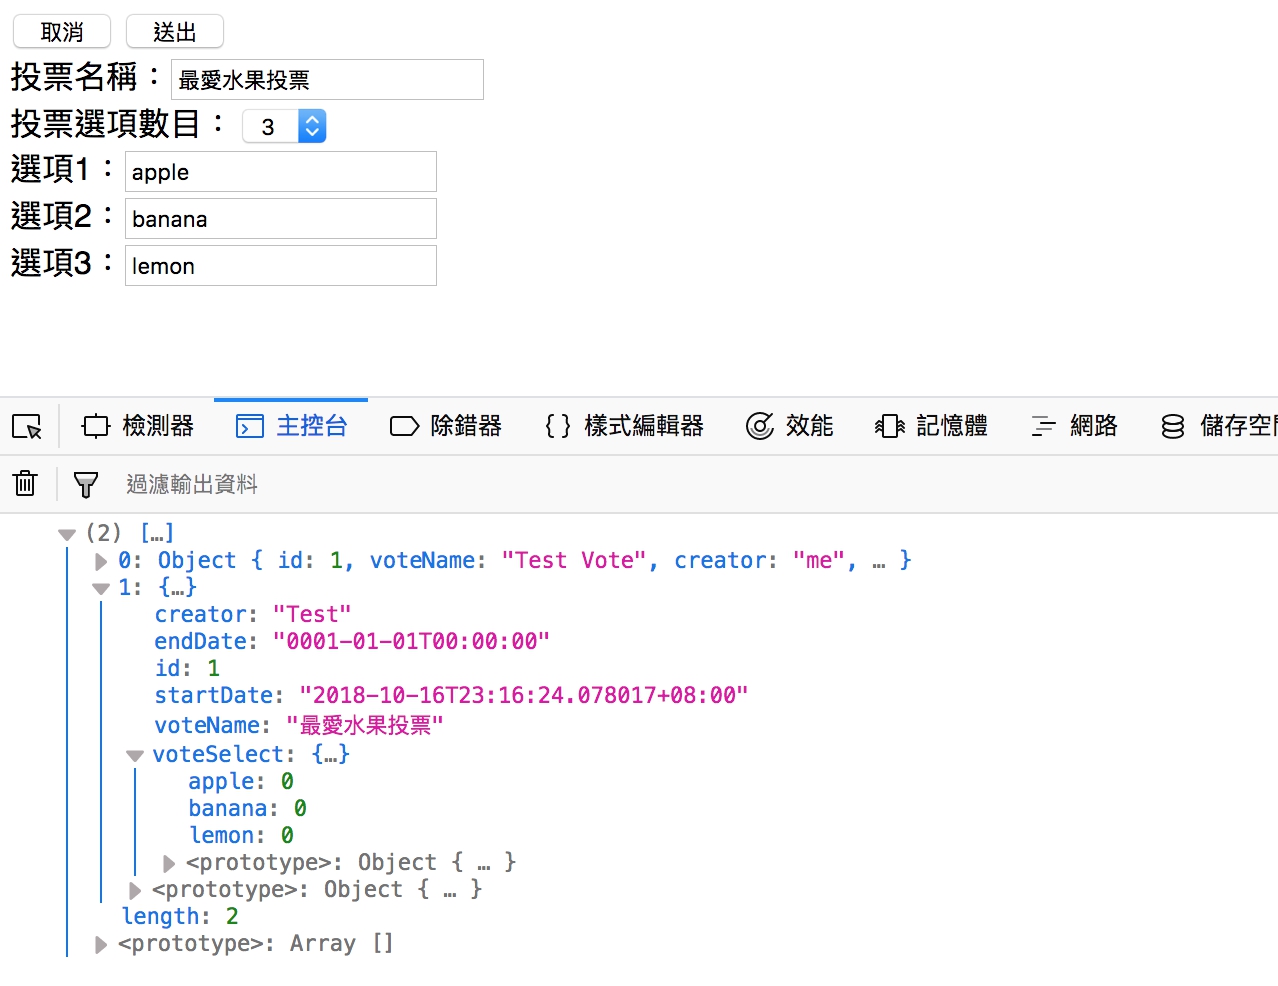
connection.on("ReceiveVoteList", function (json) {
    console.log(json);
});
|
成功後會得到下面結果

最後我們做返回鍵的事件,讓它可以返回投票列表頁。
1
2
3
4
|
document.getElementById('cancelCreateVote').addEventListener('click',function(){
    voteForm.style.display = 'none';
    voteMenu.style.display = '';
})
|
今天先這樣,明天來完成列表頁面,然後再跟建立投票這頁整合。
範例下載

